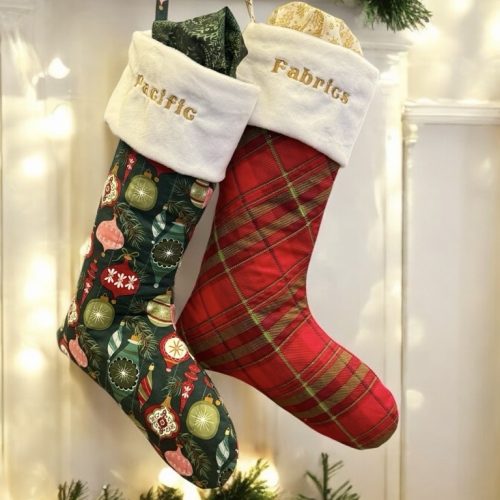
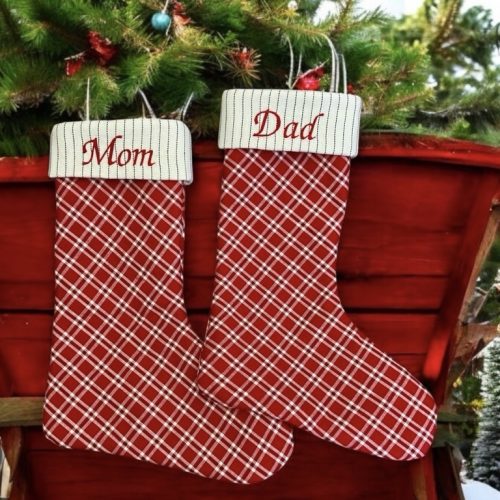
Custom Embroidered Stockings
Are you planning to make stockings this year? Let us help make them extra special with our custom embroidery service!
Follow these three easy steps:
- Visit our store and choose the perfect fabric for your stocking.
- Stop by the embroidery station where we’ll help you cut out the cuff and select a font and thread color to match your fabric.
- Pick up your personalized cuff in just 3 business days—just in time to quilt and sew your stocking, ready for the cuff attachment.
Get creative and add that personal touch to your holiday stockings!

Supply List for Smaller Quilted Stockings
- Woven fabric (quilting cotton, flannel, etc.)
- ⅔ yard for stocking outer (allows for directional fabric)
- ⅔ yard for stocking lining (allows for directional fabric)
- Muslin
- ½ yard for quilt backing (enough for 2)
- Does not show
- ½ yard for quilt backing (enough for 2)
- Quilt batting
- 16” x 24” piece
- Our table runner batting is perfect for individual stockings or the craft sized prepackaged will make multiple ones)
- 16” x 24” piece
- Cuff fabric (cuddle, quilting cotton, flannel, velveteen, etc.)
- ⅓ yard (enough for 3 cuffs)
- Thread
- For quilting your stocking front & construction
- Ruby Star Candlelight Stocking pattern
- Kraken stocking is full sized
- Pacific Fabrics and Mom & Dad stockings are at 85% scale.
- Print this sized pattern yourself at home or pick up a copy in store.
Smaller Quilted Stocking Adjusted Instructions
- Cuff
- Cut a rectangle that is 10” tall by 15 ½” wide
- If you want to embroider a name on the cuff, now is the easiest time to do it.
- If you are using cuddle, pay attention to the direction of the pile and how the cuff will be positioned on the stocking.
- Fabric hang loop:
- Cut a vertical strip of fabric 2” wide by approximately 10-12” long.
- Fold in half lengthwise wrong sides together and press. Fold long raw edges in to meet at the fold and press again. (Similar to how you would make binding.)
- Top stitch along both long sides.
- Trim to your desired length. (the pattern suggest 9”)
- If your threads knotted up at the beginning or end of your strip you can simply cut off those parts.
- Follow directions as if you were using ribbon.

